An underrated programming language.
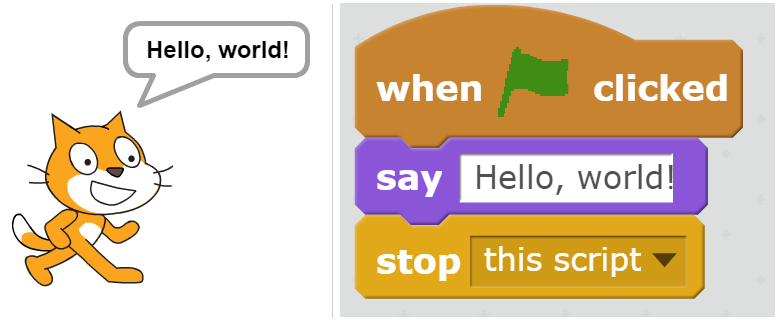
The ‘Hello World’ program written in Scratch – Hello World is often used as a simple program to illustrate the basic syntax of a programming language for a working program.
Scratch is a graphical programming language and online community where users can program and share interactive media such as stories, games and animations. Whilst it is targeted at 8 to 16 year olds, anyone of any age can write a program in Scratch.
At first glance Scratch looks pretty basic, which for a large part it is. As a visual programming interface, blocks are dragged from a palette and assembled to create programs without the need for the user to type written commands or syntax for the computer to process.
However, when I work with some teachers who have wider experience in computer programming languages, they are often critical of Scratch for reasons such as:
“It isn’t a real programming language!”
“Real coders don’t use blockly…”
“It’s far too basic and not challenging enough!”
“Would a paid computer programmer use Scratch in their workplace?”
Beliefs such as these miss the point that a programming language is a language that allows people to communicate instructions to a computer. This is exactly what Scratch does, without the worry of having to manually type and assemble the commands through text. For example, a user can give instructions like “make that character move forward on the screen”, or “wait 5 seconds, then play this sound”. The friendly and easy to use approach with blocks means that the gap towards understanding computer programming is minimised, as it is far easier to use and evaluate intended code. Hence, children as young as 8 years can be immersed in the world of computer programming with much delight.
However, beyond moving and meowing cats (which is what users typically create the first time they use Scratch), projects can be far more complex because of important features such as ‘loops’ (repeat blocks) and ‘conditionals’ (if-then blocks). With these commands, users can create algorithms, or instructions to complete specific tasks upon specific events. This ties in beautifully with the scope of Digital Technologies found in the Australian Curriculum, where students from even as early as Foundation begin to conceptualise algorithms.
The Papert legacy heralded by Resnick.
Long time advocate and founder of Scratch, Mitch Resnick, believes that as children create with Scratch, they learn to think creatively, work collaboratively and reason systematically (Resnick, 2014).
Today, Resnick leads a research group at Massachusetts Institute of Technology’s Media Lab, where amongst many other initiatives, the team continues their work on the Scratch programming language and social platform. There are more than 20 million users worldwide, known as ‘Scratchers’.
Scratch is based on the seminal work of Seymour Papert, who died in 2016. Papert developed the Logo programming language, which was essentially the first programming language for kids. He was a pioneer of educational technology and among the first to advocate laptop programs in schools. Papert pushed the envelope for young children to explore, experiment and express themselves through the use of computers (Papert 1980).
Resnick has written about the profession’s default assumption that computers are a way to pour knowledge into our kids. He argues that we should be focusing instead on creating open sandboxes with “low floors” (easy ways to get started), “high ceilings” (ways to chain together tools to make sophisticated projects), and “wide walls” (lots of paths to accommodate many learning styles). (Resnick, 2017)
In my experience, Scratch really is a perfect experimental and development playground when it comes to developing notions of computer science with young children. The interface and language is intuitive and logical to express simple ideas, yet expansive enough to make even sophisticated games, animations and stories.
The Scratch Cat is the mascot of Scratch and the default sprite when opening a new Scratch project. He / She becomes the protagonist for many projects.
The 4 P’s of Creative Learning.
Resnick and the Lifelong Kindergarten team attribute the success of Scratch upon 4 ideas or elements: Projects, Passion, Peers and Plays (Resnick, 2014). The so-called Four P’s of Creative Learning are strongly aligned with (and inspired by) the Constructionist approach to education, which emphasizes the value of learners playfully creating personally-meaningful projects in collaboration with peers:
Projects – We learn best when we are actively working on projects – generating new ideas, designing prototypes, making improvements, and creating final products.
Peers – Learning flourishes as a social activity, with people sharing ideas, collaborating on projects, and building on one another’s work.
Passion – When we focus on things we care about, we are likely to work longer and harder, to persist in the face of challenges, and to learn more in the process.
Play – Learning involves playful experimentation — trying new things, tinkering with materials, testing boundaries, taking risks, iterating again and again.
In Scratch, students can create projects which interest them through play. They are able to share their projects through an online community which has the potential to be viewed by others. Providing an audience to students can be incredibly motivating and purposeful. One only has to look at the gallery of published projects on the Scratch home page (see scratch.mit.edu/explore) to find that audience members indicate their enjoyment for a project through comments, and perhaps even more flattering, can also remix and make variations on the original project. It’s not uncommon to find suggestions or questions to the author about why they made certain choices. The author can choose to become engaged with these comments and make changes based upon them, illustrating how something becomes better when people think through it together.
Whilst these four P’s are not radical new ideas, they do provide a valuable framework in supporting creative learning and thinking – an essential 21st century skill to equip our students with.
Using Scratch in a classroom setting.
The Scratch team has put in a lot of effort into moderating the community to maintain the type of positive and safe environment where people can play – not just to have fun, but to take risks, test boundaries and try new things.
Scratch originally started as a tool for kids, but it wasn’t necessarily built for classrooms. In the past, managing projects has been challenging for some teachers trying to use Scratch in schools. However, teachers have the option of creating a teacher account to create classes. From within the class, the teacher can send a signup link so that students can sign up for the class and create an account within that class. This process does not require individual email sign-ons for each student, which might be challenging for some schools and age groups.
Within class accounts, teachers can change student passwords, assign projects, send updates and moderate student behaviour. If a student does something against the policies of the Scratch community (see scratch.mit.edu/community_guidelines), MIT will send an email to the teacher. Teachers can also create studios, which is like an assignment, where all students in the class will automatically be followers of the studio and be able to receive updates about it and add projects to it.
Scratch platforms
Scratch has seen many versions and iterations since it’s conception in May 2007. For a while, the only way to use Scratch was to use an offline installer on the Linux, Mac or Windows platforms. In May 2013, the arrival of Scratch 2.0 meant that users could now create programs using an online editor at the Scratch website. It also made it possible to instantly see the code inside other’s users projects and remix those.
Scratch 2.0 is fantastic for students who can read, but users younger than 7 or 8 years old often struggle to understand the concepts in Scratch.
In 2014, the Scratch Junior (or Scratch Jr) platform was introduced, specifically designed for younger children. It runs on tablets as well as Chromebooks, and is much more touch friendly and suitable for early year learners with it’s bright and appealing interface. Many of the programming concepts of Scratch 2.0 are also found in Scratch Jr, however the difference is that the commands are made much more simple by representing them as images or symbols, rather than words. This means that children aged 5 to 8 who are still learning to read can create their own interactive stories and games. Similarly, children snap together the graphical programming blocks to make characters move, jump, dance and sing. Users can modify characters in the paint editor and add their own voices and sounds, even insert photos of themselves – then use the programming blocks to make their characters come to life.
You can get started with Scratch 2.0 at the website scratch.mit.edu/create using most modern browsers (flash enabled) with an internet connection.
Offline versions of Scratch for Windows, Mac and Linux can be found at scratch.mit.edu/scratch2download/
The Scratch Jr app can be located on iTunes for iPads, on Google Play for Android, or the Chrome Web Store for Chromebooks.
Due to be released later this year, Scratch 3.0 will land on public release and will not be reliant on flash, which means it will basically work on anything AND be able to program USB / Bluetooth connected devices / peripheral / robotics. You can check out the pre-release now by going to preview.scratch.mit.edu
How to get ‘scratching’
Upon launching the editor you will notice the interface divided into several panes:
- > The Stage – is where the action happens when the program is run. The stage can also contain several backdrops that can be used for titles or interfaces.
- > The Sprites – which contains a library of objects or graphics to use in the program. Sprites can also be created from a blank canvas or imported as images from an external source.
- > The Scripts – which contains the available set of programming blocks.
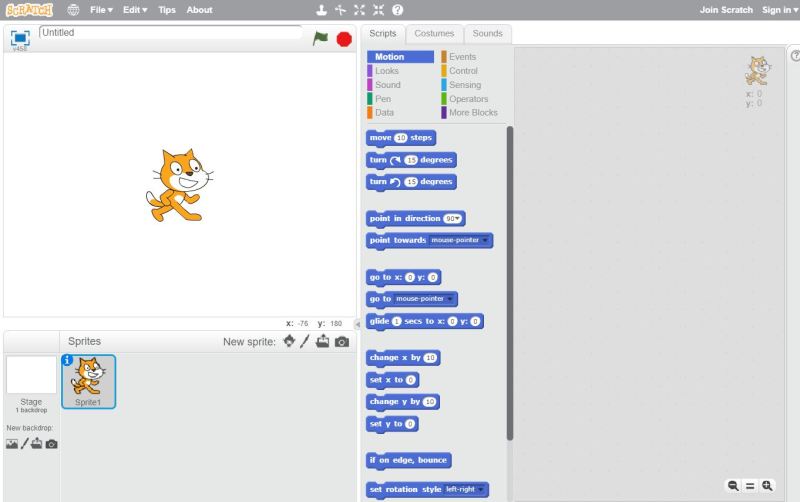
The Scratch interface as viewed by default when the program is launched.
Blocks can be dragged out into the work area to program the various sprites in the project. Snapping together like lego, it’s very easy to see how the relationship and order of the blocks affect each other.
There are 10 types of block categories:
- Motion — Make the given sprite move, whether by steps, toward another object, or via direct coordinates.
- Looks — Lets the sprite hide or show itself, switch costumes, change size, or move between layers.
- Sound — Play sounds, change volume, or adjust the tempo.
- Pen — Draw with a marker and change its color and shape.
- Data — Lets you create your own variables. This comes in extremely handy for elements that Scratch doesn’t have built-in.
- Events — Criteria for kicking off other actions, like when you click the green flag or press the spacebar. These blocks connect with the other blocks to make the action happen.
- Control — Loops to repeat an action, perform an if-else statement, or stop something.
- Sensing — Place these blocks into others to perform actions when a sprite is touching another element or the user is holding down a key.
- Operators — Math elements that let you perform arithmetic or basic boolean operations on variables.
- More Blocks — Make your own blocks if these aren’t enough!
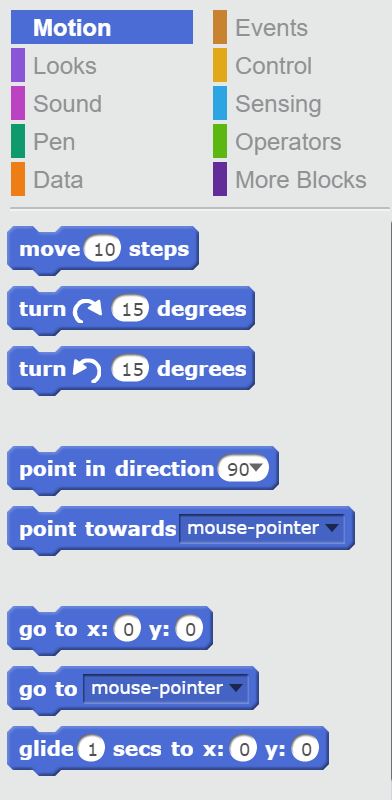
Users can select from various categories of commands. Blocks are colour coded to make it easy to distinguish.
Resources
Educators wishing to explore the possibilities of Scratch with their students may find the following resources useful:
Scratch for Educators (scratch.mit.edu/educators) – Contains advice for all educators for using Scratch. See also scratch.mit.edu/parents.
Tutorials and activity cards (scratch.mit.edu/tips) – Easy to follow and navigate, these step-by-step tutorials are a great way to explore application uses within the Scratch platform, for example making objects fly, animating a name, making music, or making a paddle game. Many of these tutorials can also be found in the help tab inside the Scratch editor.
ScratchED (scratched.gse.harvard.edu) – An online community for educators by educators, ScratchED contains resources and ideas for using Scratch with students.
Computer Science First (csfirst.withgoogle.com) – CS First provides enrichment materials for students in Years 4 to 8. Facilitators use video tutorials to teach concepts of computer science through themed clubs, for example Game Making and Storytelling.
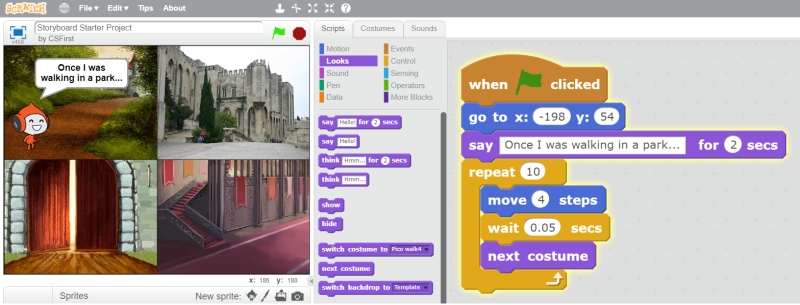
An example of an animated storyboard that students can be guided through using the CS First materials.
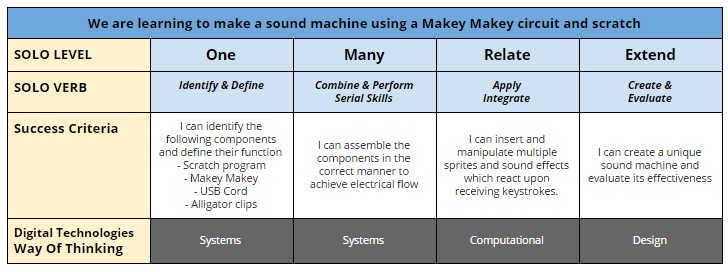
Makey Makey projects for Year 3 to 6 students (anthsperanza.com/2017/06/27/mmprojects/) – Previously, I have written about project ideas and lessons involving Scratch and Makey Makey hardware to make physical objects interactive.
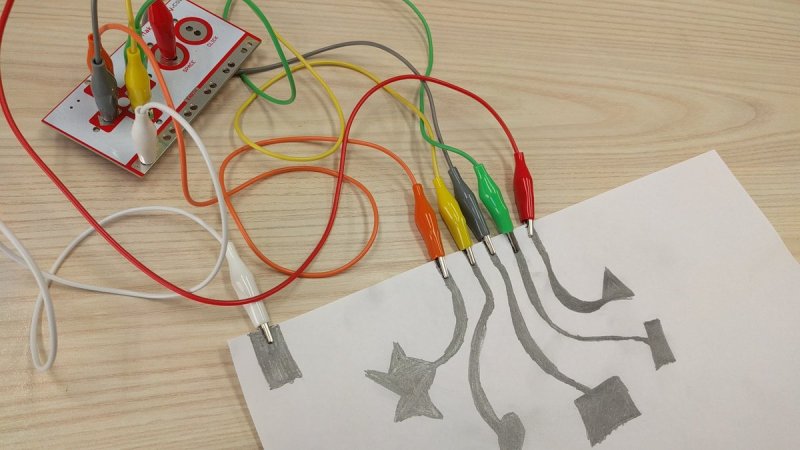
An interactive electronic paper circuit, powered by Makey Makey and Scratch.
Let’s Teach Kids To Code, TED Talk by Mitch Resnick (ted.com/talks/mitch_resnick_let_s_teach_kids_to_code) – Mitch Resnick demonstrates the benefits of teaching kids to code, so they can do more than just use new tech toys but also create them.
References
Resnick, M (2014) Give P’s A Chance: Projects, Peers, Passion, Play. Paper presented at Constructionism 14 Conference, August 19th – 23rd 2014, Vienna, Austria. Available at: http://constructionism2014.ifs.tuwien.ac.at/papers/1.2_1-8527.pdf
Resnick, M. (2017). Lifelong Kindergarten: Cultivating Creativity Through Projects, Passion, Peers, and Play. MIT Press.
Papert, S (1980) Mindstorms: Children, Computers and Powerful Ideas. Basic Books, Inc. Publishers.
About this article
This article was originally prepared for the November 2017 issue of the ACEL e-technology publication, and has been modified to suit this post.

